
Eve Development Environment
Posted: 2014-03-14 Filed under: eveonline, market | Tags: heidisql, mysql, ubuntu 5 CommentsOverview
The following guide covers details on how to setup your own Eve Development Environment on your local machine. Using these directions you can create a master Virual Machine template, import the Eve Static Data set into a MySQL database, and query it with a database management program.
I plan on having further guides on running other pieces of software. I want to write guides for Lockefox’s Eve-Prosper tools and the once active Wallet Manager program that I have blogged about; once I learn how to create a public repository on GitHub, I will have a guide on how to run it from a template VM as outlined in this guide.
Virtual Box Setup
Rather than install server services on your local machine, we’re going to isolate them in a Virtual Machine that can be backed up and cloned into unique instances for our needs.
- Download and install Virtual Box here.
- Download Ubuntu Server ISO image here. Since we won’t be interfacing over the GUI, we can lessen the resource consumption of the VM by going with the Server edition.
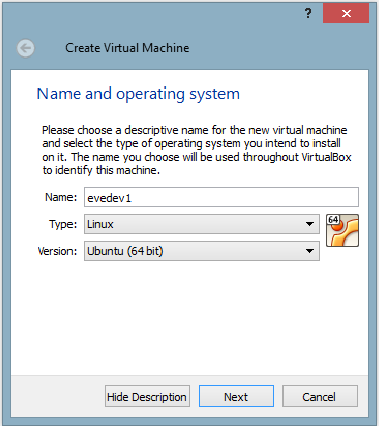
- Create a new Virtual machine named evedev1

- Select 512 or 1,024 MB of RAM depending on how much you have on your desktop and how quickly you want your Development machine to run. The more RAM the better, but with the Eve static data set coming it at 525 MB, you will reach a diminishing return after the majority of the data gets into RAM. You can always adjust this setting by powering off the VM if you find performance to be problematic.
- Create a virtual hard drive now.
- I’m partial to the VMDK format given my VMware background.
- Select Dynamically allocated as not to claim empty space on your machine.
- Specify 8 GB of storage to start or more depending on how much free space you have available. The base server install will take around 1.2 GB.
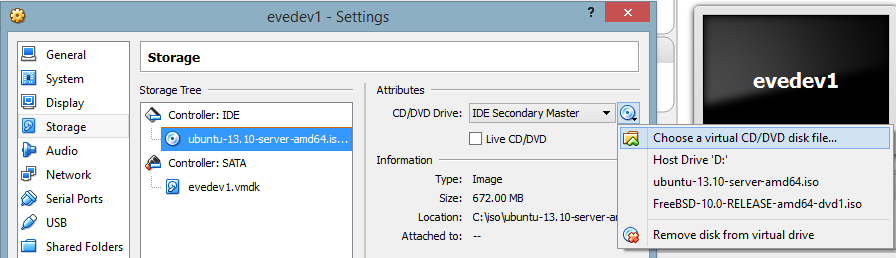
- Go to Settings on the evedev1 machine and Chose a virtual CD/DVD disk file. Select the Ubuntu Server ISO that you previously downloaded.

- Start the VM.
Ubuntu Server OS Setup
I prefer Ubuntu but you may want to use any number of Linux distributions.
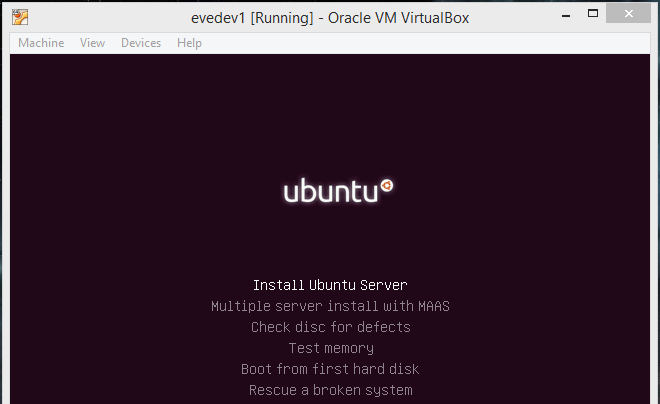
- If your ISO is mounted correctly, you will be presented with a Ubuntu boot screen.

- Select Install Ubuntu Server.
- Select your language, location, and keyboard mappings.
- Name the machine evedev1
- Create a evedev user.
- Create a password for the evedev user.
- Under partition disks select Guided – use entire disk. Since this is a Development VM, we will most likely not be using LVM.
- Select the partition and on the next screen write the changes.
- Allow apt to run to update packages.
- Select Install security updates automatically.
- Only select the OpenSSH server for now as we will be installing the database separately.
- Install the GRUB boot loader.
- After the installer finishes, reboot the VM.
- If everything is setup correctly, you should see a login prompt.
Creating a Template VM Image
This process gets us to a point where we have a base OS with patches installed. If we make any steps we can revert back to this image and also use this to spin off future copies of VM instances.
- Login as evedev with the password set during the install.
- Update local package database index with sudo apt-get update
- Update local packages with sudo apt-get upgrade. This process will take a while depending on the speed of your machine.
- Shut down the VM with sudo shutdown -h now
- If you want to make a backup of this file, do it now. We will consider this our Template VM image for making future clones.
Database Setup on a New Clone
- Create a Clone of evedev1 by right-clicking on the evedev1 machine and selecting Clone
- Name this clone evedev1-mysql and select Reinitialize the MAC address of all network cards.
- Select Full Clone.
- Power on the evedev1-mysql instance.
- Log in and check the IP address of the machine by using ifconfig.
- SSH into the IP address of your VM using PuTTY. I find that using PuTTY is more efficient than the Virtual Box interface since we will be pasting a long URL and will enable us to remotely access the database later.
- Install MySQL with sudo apt-get install mysql-server
- Set the mysql root user password.
- Find the latest MySQL conversion of the Eve Static Data at https://www.fuzzwork.co.uk/dump/.
- Copy the link of the latest conversion to your clipboard and download it with wget https://www.fuzzwork.co.uk/dump/mysql56-example.tbz2
- Uncompress the file with bunzip2 mysql56-example
- Un-tar the file with tar -xvf mysql56-example
- Change directory with cd rubicon-1.3-95173
- Enter the MySQL Monitor with sudo mysql -u root -p
- Create a new empty database with create database rubicon95173;
- Exit with exit;
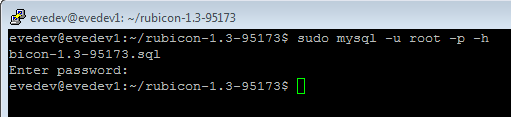
- Import the extracted .sql with sudo mysql -u root -p -h localhost rubicon95173 < mysql56-rubicon-1.3-95173.sql
- Wait for the import process to complete. The import took around 6 minutes on my laptop.
Remote Database Management
I prefer HeidiSQL to access the database, store queries, and edit table structures.
- Download and install HeidiSQL.
- Create a new Session and fill in the details for your VM. The details on the Settings tab will be the MySQL root user credentials for Hostname 127.0.0.1.
- Under the SSH tunnel tab, specify the location of your PuTTY executable. The SSH host + port will be the IP address of your VM such as 192.168.0.20 on port 22. The credentials on this tab will be for the evedev account.
- If successful, you should see our imported database and tables.


Running Queries
I wrote a guide on the basics of the Eve Static Dataset and some sample queries here.
Tips for Eve Blogging
Posted: 2014-03-07 Filed under: eveonline Leave a commentWrite Towards Your Passion
I’ll be honest, I’m terrible at keeping focus on topics that don’t interest me. Every teacher that I had during my childhood education reported back to my parents that I was performing poorly in history and language related subjects and excelling at the math and science disciplines. If you are forced to write, the good content isn’t going to last and inspiration will be wain. The advice is simple, share what you like to do in Eve even if you think there isn’t an audience for it.
Do you like Lowsec pirate adventures? Do you want to share stories of grifting and chatlogs? Do you want to be a reporter on Nullsec political arcs? Share what you do best. I never thought that people would be interested in economic inefficiencies and production adventures that I do in Eve, but there really an audience for it.
Your Content Will Change
Wormholes, Nullsec, Invention, and Capital Production — I’ve shifted my focus over time and you might too. Don’t be afraid to embrace change.
Write in the Same Voice
I take a simple declarative, fact based approach to my work and that’s how I present it. There are some other blogs that write in the voice of an evil pirate or personal narrative from the inner psyche. It doesn’t matter what style you have, just stick to it.
Write in Small Chunks
I never write an entire post in one sitting as I find the quality of my work degrades at tasks that extend past two hours. It may take me a few weeks to get a post out based on how dense the spreadsheet work or research is behind it. Don’t be afraid to have posts that never make it to publication or take weeks to finish. Compose when you are in the mood for it.
Take Time Off
Yes, go outside. Enjoy another hobby from time to time. Eve will be there when you get back and spending time away will give you better perspective on issues. A rule I have with any serious personal or professional relationship is that ‘part of spending time together, is spending time apart’.
Peer Review
If you are fortunate enough to have colleges or industry partners like I have with Raath at statticmatter.com and industry.darkshadowindustries.com or Lockefox, ask them to read over your content. I am often talking to these two people on Jabber or Gchat a few times a week.
